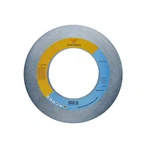
In hardware manufacturing, jewelry finishing, automotive detailing, and mold repair, polishing is often the final step that determines surface quality. Scratches, sanding marks, uneven gloss, and heat damage are common problems, usually caused by improper polishing methods rather than the equipment itself.
A properly selected wool polishing wheel offers strong cutting performance, flexibility, and good surface conformity. Combined with the right compound and operating technique, it can remove sanding marks and surface defects while producing a clean, uniform finish.
1. Choose the Right Wheel
Common options include short-wool wheels, long-wool wheels, and high-density wool felt wheels.
Short-wool wheels provide strong cutting action and are suitable for removing coarse sanding marks, oxidation, weld marks, and deeper scratches from stainless steel, tool steel, and other hard materials.
Long-wool wheels are softer and more flexible, making them suitable for automotive paint, aluminum, silver, copper, and other surfaces that can be easily scratched. They provide gentler cutting and better surface conformity.
High-density wool felt wheels have a compact and uniform structure and are mainly used for final finishing. They can remove fine marks left by previous steps and create a smooth, mirror-like surface.
2. Prepare the Workpiece
Before polishing, thoroughly clean the workpiece to remove dust, oil, rust, and other contaminants. Particles trapped between the polishing wheel and workpiece can easily cause additional scratches.
Check corners, welds, edges, and uneven areas. Large burrs or raised sections should be removed first.
For general polishing machines and rotary tools, 1,200–1,800 rpm is commonly suitable, while 2,000 rpm should not be exceeded. Softer painted surfaces and delicate parts require lower speeds.
3. Follow a Controlled Polishing Process
The basic principles are light pressure, steady movement, and temperature control.
Step 1: Prepare the Wheel
Run a new wool polishing wheel freely for about 10 seconds to remove loose fibers and dust. If the wheel is too dry or stiff, lightly dampen it and spin off excess moisture before use.
Step 2: Apply the Compound Evenly
Use a coarse compound for scratch removal and a fine compound for finishing. Apply only 3–4 drops at a time and spread them evenly across the working surface.
Avoid excessive compound, which can cause buildup, uneven gloss, and surface staining.
Step 3: Use the Correct Technique
Hold the machine firmly and keep the wool felt wheel at approximately 15°–30° to the workpiece. Avoid vertical pressure, which can concentrate heat and burn the surface.
Work in an S-shaped or straight back-and-forth pattern, overlapping each pass by about one-third of the working width. Keep the wheel moving and avoid staying in one spot for more than 8 seconds.
Step 4: Control Heat
Excessive heat can discolor metal or reduce the gloss of painted surfaces. If the workpiece becomes noticeably hot, stop and allow it to cool.
After each section, wipe away the remaining compound with a clean, lint-free cloth and check for scratches before continuing.
4. Add a Final Polishing Stage
For a mirror finish, replace the coarse polishing wheel with a high-density fine wool felt wheel and use a fine polishing compound.
Reduce the machine speed and apply lighter pressure with slower movements. This final stage removes fine marks and swirl patterns, giving the surface a deeper and more uniform gloss.
5. Avoid Five Common Mistakes
1. Excessive pressure: More pressure creates more heat and accelerates wheel wear.
2. Staying in one spot: Localized heat can cause burning, discoloration, or loss of gloss.
3. Mixing wheels and compounds: Coarse abrasive particles can remain on the wool polishing wheel and create fine scratches during finishing.
4. Not cleaning the wheel: Hardened compound, dust, and metal particles can cause new surface defects.
5. Over-polishing edges: Excessive pressure can remove coatings, deform thin sections, or round sharp edges.
6. Maintain the Wheel
After use, remove compound, dust, and metal particles from the wool felt wheel. Residue should not be allowed to harden inside the fibers, as this reduces flexibility and polishing performance.
Store the wheel in a dry, ventilated place and regularly loosen the fibers to keep them evenly distributed. Proper maintenance helps extend service life and maintain consistent finishing results.
Final Thoughts
A good polishing result depends on the right combination of wheel selection, speed, pressure, temperature control, and maintenance. Using the correct wool polishing wheel, polishing wheel, and wool felt wheel for each stage can reduce scratches, burning, and rework while delivering a cleaner, more consistent mirror finish.